Showing posts with label sewing. Show all posts

Tuesday, September 23, 2014

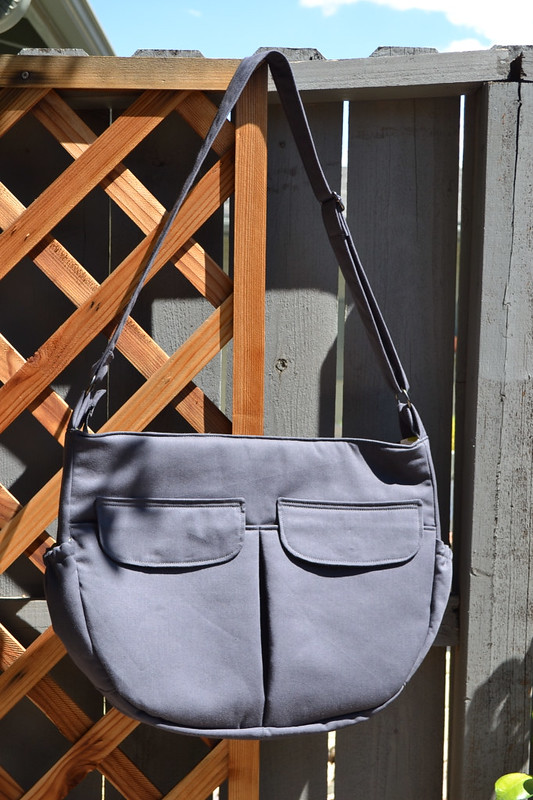
the fashionista diaper bag

... from Lisa Lam's book, A Bag for All Reasons.
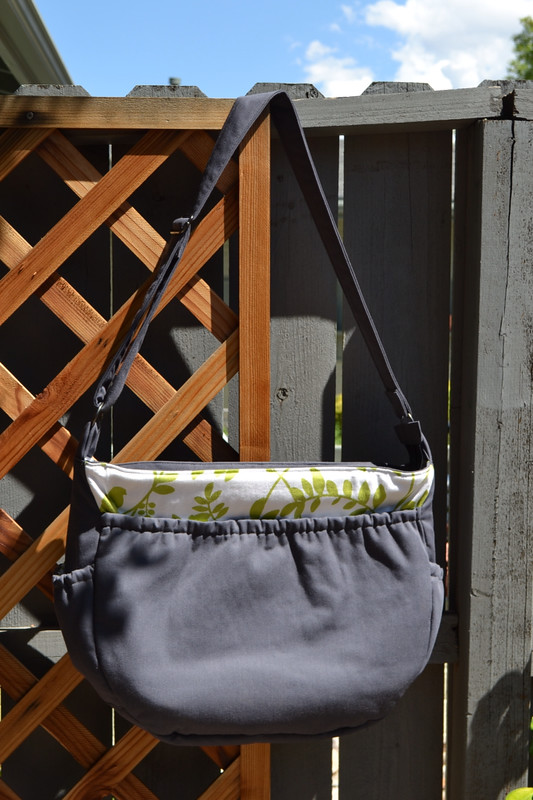
The fun thing about constructing your own bag
(although this one is not for me -- it was commissioned
by a friend!) is the freedom to customize things
like this peekaboo pocket top (above).
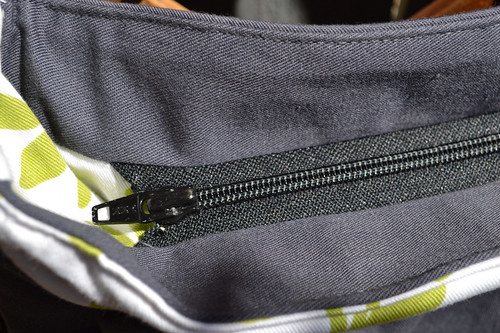
Lisa's pattern includes a concealed zipper top. I adapted
the instructions to utilize the external fabric above the zipper.
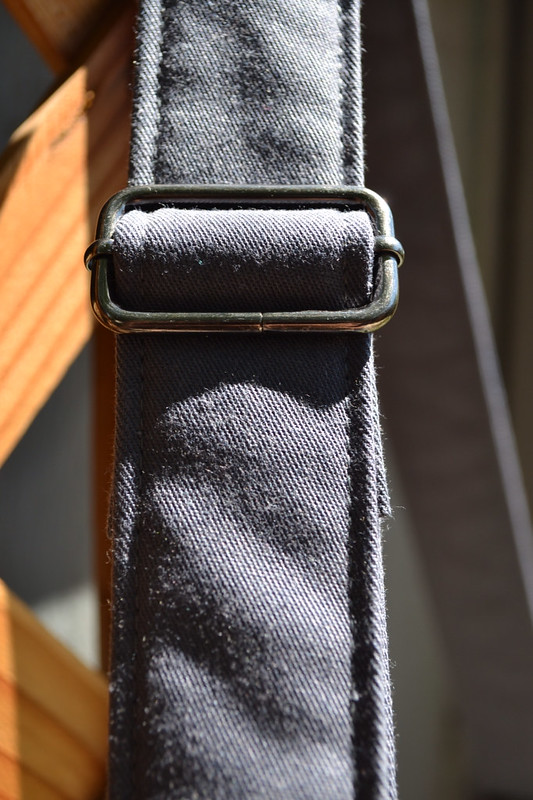
The pattern also includes nice details like adjustable straps.
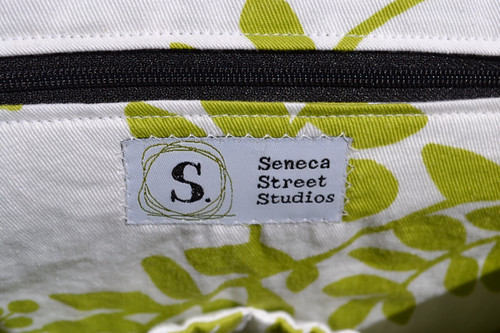
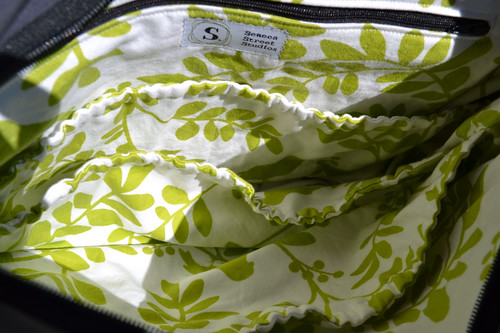
It has 9 pockets in total, of varying sizes.
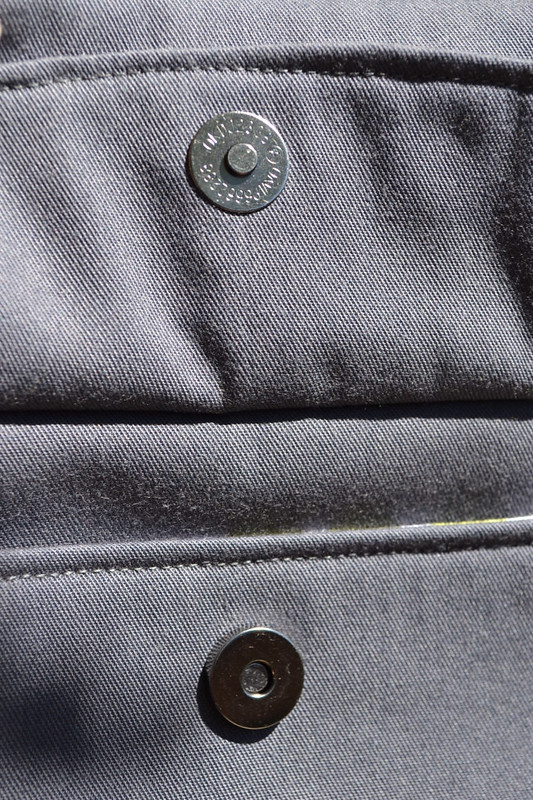
I opted for magnetic snaps on the front pocket flaps
instead of velcro strips. While I prefer patterns that
use more charts & drawings, Lisa's instructions
are clear and her tutorial photographs are helpful.


Monday, November 18, 2013

changing pad

Commissioned recently by 
my friend Hannah, 
whose husband designed 
my snazzy labels & logo. 

I love her choice of fabric!


Tuesday, March 26, 2013

Here's the first of the aprons!
This is the Emmeline by Sew Liberated.
Samantha ordered it up as a bridal shower 
gift for a friend. She's showing off the reverse 
side, which also has turquoise trim and ties.

Friday, March 15, 2013

aprons away!

I just bought three new apron patterns, and I'm super stoked!
First, I've been looking for a one size fits all pattern to make a basic
apron for the people who make dinner each week at our church.
Second, while I've made the Emmeline Apron before, I had borrowed
the pattern. A friend asked me to sew one up as a wedding shower
gift, so I went ahead and invested in the pattern for future use.
Finally, I ran across the Gathering Apron last week, and I really
like the design, which includes a gigantic front pocket (a pouch, really).
So here's to a springtime full of freshly sewn aprons!

Sunday, January 13, 2013

further pattern development

 
I spent a good bit of time last year developing a diaper clutch pattern
that would work well for cloth diapers. In the current stage of
development, I finalized my paper patterns and did another run
as a gift for a friend who recently had a baby. As you can see, I also
figured out how to rivet leather for the handle. How fun is that?
The interior of this bag has a zip pocket for keys and the like,
not a built-in wet bag. Turns out if the wet bag is internal,
the whole clutch has to be washed on a regular basis.
Instead, I included a couple of separate wet bags which can
be easily laundered and also clip onto the bag handle if desired.
I guess now it's time to sew one up for the ol' etsy shop!
 

Wednesday, December 19, 2012

the multi-tasking tote is done!

Here it is! I just finished up the tote/
diaper bag I've been working on --
the Multi-tasking Tote from Lisa Lam's
Bag Making Bible. Isn't it cute?
I used smoke gray and yellow duck (Artee), accented
with Joel Dewberry's Aviary 2: Bloom in Granite.
Both interior and exterior have lots of pockets.
And the base is internally reinforced and has feet!!
 

Tuesday, December 18, 2012

oaktag patterns

I'm in the midst of sewing up a diaper bag that a friend
of mine commissioned. It's the Multi-Tasking Tote from
Lisa Lam's The Bag Making Bible. Lam's patterns are all
layered up on the pattern pages, so there's no way I'm
chopping them up. Also, a while back I learned
from Fashion-Incubator that in commercial settings,
patterns are cut out of oak tag -- a heavy manila paper.
Instead of cutting around the pattern, the shape is traced
onto the fabric and then cut. I like to use white china
markers for this. This method works great, makes for
durable pattern pieces that are easy to track down later,
and produces fabric pieces that are reliable and
sew together correctly. So here's my light board
and my fresh, new pattern pieces!
 

Tuesday, November 27, 2012

more jammies

I pulled out the serger tonight and went to town on some more
jammies. This time just the shorts, in pink fleece for my girl.
The pajama bottoms sew up super quick, so I think I'll stick with
them and go with cheap t-shirts for the tops.
 

Friday, November 9, 2012

girl jammies

 Here's a snap of the girl jammies I finished last weekend (after being
worn several times and tossed in the laundry). Ashton opted for short sleeves 
and shorts, which is the fun of being able to customize a pattern.
I find the difference in the fabrics they picked quite hilarious.

What has also been funny about this whole experience is that 
at the start, I thought I would save money by sewing my kids' pajamas.
After buying the pattern on sale (for $1) and picking up the fabric
at half off, I still walked out the door with thirty dollars worth of
"now I still have ten hours of cutting and sewing ahead of me."

Were they worth it? The fact that I'm scheming up coordinating sets of 
jammies so they can be mixed and matched with these, as well as thinking,
"what if we made the pants out of old modal sheets (sooo softy!)"
or "a strip of velvet ribbon would be nice on the neckline" 
makes me think that probably they were.

Tuesday, October 30, 2012

boy jammies

 
My children are growing at alarming rates these days.
In fact, the pajamas Elliott received for his birthday a year ago
are now a good six inches too short. Since he is sproinging
out of jammies, I thought I'd sew some up myself
for the winter, extra long, so that they can be
easily lengthened over the coming months.
 
I found a unisex pattern, Simplicity #3935, with child to adult
sizes. The pants sewed up super easy. However, I had to adjust the
opening on the shirt to accomodate Elliott's realistically sized cranium.
My seven-year-old picked out his own fabric, as you can see.
After I took the photo above, I realized that they were effectively
camouflaged into the background greenery!
So here's another photo to show a little more detail.
 

Wednesday, July 11, 2012

another cutesie handbag

 
Here's another bag sewn up from
Keyka Lou's Small Satchel pattern.
I love how this bold print and
the bright colors accentuate its shape.
 

Friday, June 22, 2012

new clutch design

As I've now given several Grab 'n' Go diaper clutches to friends,
we've discovered that they work great with disposable diapers
and not well with cloth diapers. So I spent some time in May
designing a new diaper clutch pattern -- one that would have a front
flap closure which allows for fabric matching, plenty of internal
space for two cloth diapers + wipes and changing pad, and a
zipped wet bag pocket for bringing dirty diapers back home.
The challenge was adding all these features and maintaining a sleek shape!
My first attempt, above, came out too saggy with the zip pocket
in the front wall of the bag. The sides of the bag also needed shaping.
For the second attempt, I angled the sides to curve in
slightly toward the top. I also mirrored this shape in the flap.
Finally, I changed the zipped pocket to an inset zipper
and added a waterproof inner lining (polyurethane laminate)
which can be untucked for easy washing.
 
The final (third) round ended up getting an inch taller and
two inches longer. I don't have photos of it with me in Oregon,
so I'll have to post it when we get home next week!

Wednesday, June 20, 2012

jar o' buttons

My friends Hannah and Steve picked up this
jar of buttons for me at an antique shop recently.
I can't wait to dig in and sew some buttons on things!
 

Friday, June 15, 2012

new pattern try-out


This bag is sewn up from Keyka Lou's Small Satchel pattern.
I like the way it turned out, but I prefer how the flap covers
more of the opening in her Half-Moon Handbag.
It's possible to match the print on either bag (see how the flap fabric
blends with the pattern on the body of the bag?), which is tasty!

I'm currently on vacation with my family in beautiful Corvallis, Oregon.

We're having a great time!


Wednesday, June 6, 2012

the most rustic bag


Just before leaving on our family vacation to Oregon, I wrapped up

a few sewing projects I had been working on. This particular bag was

a new version of one I had made before, but this time I experimented with

a new technique for attaching the lining. Unfortunately, speed and

experimentation don't at all go hand in hand, and I found myself at the

one week deadline with a fully lined and pocketed strip of fabric which was,

in fact, not a bag at all. I resigned myself to finish it by folding the thing

in half and sewing the seams on the outside (yes, an audible gasp from

the audience is fully appropriate here), which also entailed breaking

every one of my last remaining sewing machine needles (fully lined and

interfaced burlap is pretty darn hardy) and reverting to upholstery thread.


I delivered the bag with the disclaimer that if my friend would like

to throw it away and await my return from vacation,

I would happily whip up another while sustaining no offense.

However, this particular friend is not shy about sporting "shabby chic"

accessories. She has embraced said bag fully without complaint.

So there you go.

This is truly the most rustic bag I've ever made.

But there can even be beauty in that.


Sunday, April 29, 2012

half-moon handbag

 I just made this lovely little bag from Keyka Lou's 
Half-Moon Handbag pattern. I adjusted it by removing the
button closure and adding magnetic snaps.

 The lining is the same suiting fabric in a lighter shade of gray.
 I opted for a happy mustard print for the lining, though!
 Once it was done, I was pretty happy with the way it came out.
However, this rose pin makes all the difference for me. 
Now I love it!
I'm excited to have a cute little bag that will work well in more 
formal settings, which I occasionally (albeit rarely) encounter. 
Now I can leave my backpack behind!!